Blueshire Services
ImageMap App
Example Sets of Data
Version 1.0.0
Table of Contents
This document introduces you to the range of applications that the ImageMap tool can be applied to. It starts with the base concept of an office plan and the details of each employee, their phone number, e-mail, title that other employees might find useful. It has similiar information to the Contacts app but laid out in a two dimensional space. At first the two dimensional space was thought of purely in terms of the office plan approach but then this widened to a two dimensional structure for other applications and this is demonstrated in the third dataset where an IT project is displayed with the project members grouped into a project structure with the details of each individual displayed when required.
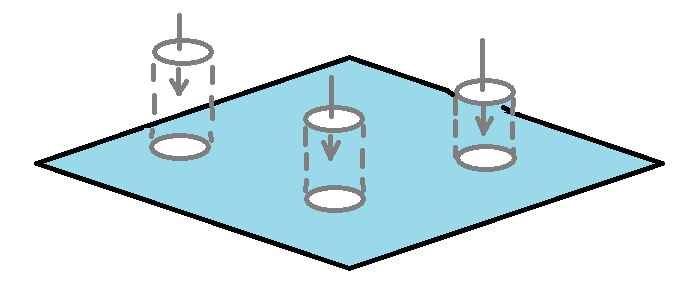
The structure of the app is illustrated in the diagram on the left where the light blue square represents the underlying image which is defined as the screen and then the individual items are positioned on top of the screen. These items can be one of three, either an employee, an item or a link that connects to another screen.
When you come to create your own screens it is helpful to think in terms of the structure just described.
The fourth dataset detaches entirely from the employee/office scenario, instead it details a car and demonstrates the use of the ImageMap tool in creating a help manual for specific tools/machine. In the case of this data set it is a Ford Fiesta but it could be any machine. In reality it is expected that the tool would be most useful in the case of machines/tools that are of a specialised nature and therefore limited in production quantity. ImageMap would enable an organisation to provide a help manual without the need for a large print run. It could also be updated as required.
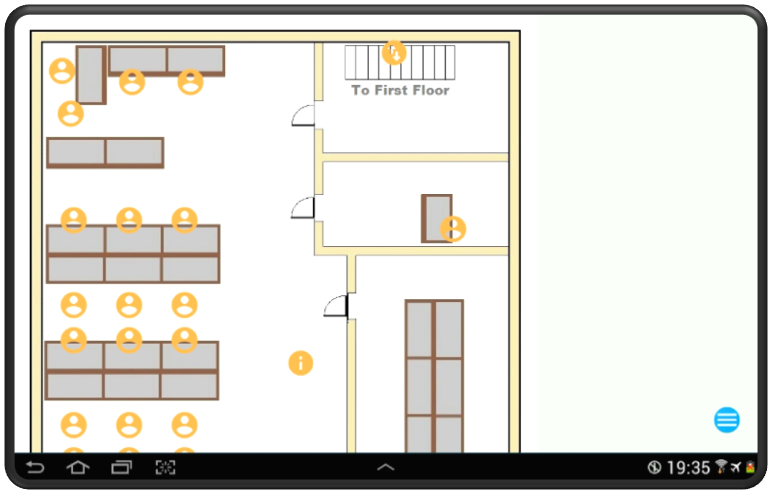
The Office data set demonstrates the use of the tool ImageMap to assist employees in the office environment. In todays office where employees work in large openplan offices it can be easier to recoqnise a person by his/her location rather then a surname. One knows where there desk is but one is unsure what their surname is and so to obtain the information to communicate with them a two dimensional diagram as shown on the left can be helpful. This would especially be so for peaple new to the office. In fact for a large corporation an ImageView dataset could be made available for each office so that when peaple travel to an unfamiliar office they could download the dataset for that office.
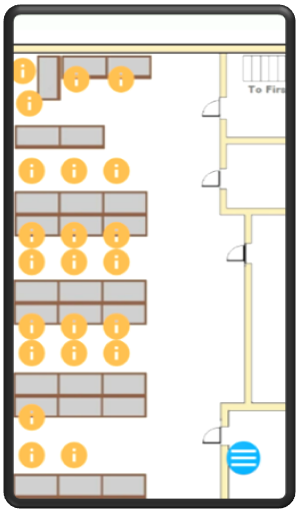
ImageMap can be loaded onto either a tablet as shown on the left or a mobile as shown below.
The tablet screendump shows all three types of icons. There is the employee icon positioned at the desk. There is also the item icon which in this case gives details of the printer in this part of the office. This would be the type of information that someone new to the office would require. There is also the link icon positioned on the staircase which will allow the user to move to the first floor layout without having to go through the main menu.
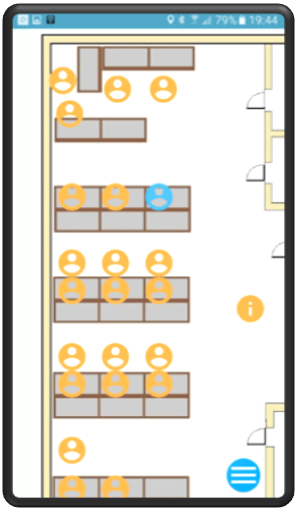
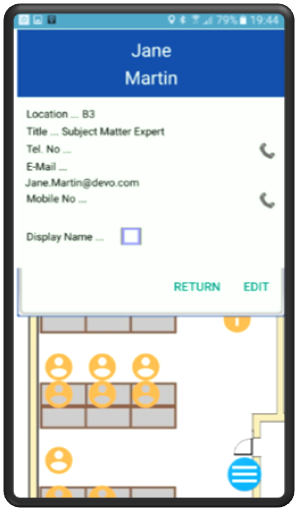
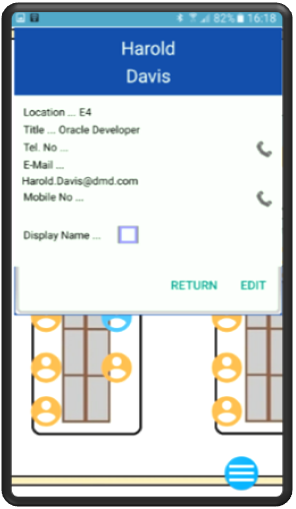
To display the specific information on an individual, touch the icon representing the person so that it is highlighted in blue, then touch the highlighted icon a second time and a dialogue will open giving the individuals details as shown below. By pressing the edit button you can edit the details. It might be the case that the organisation only gives details of the desk phone in the main download but individuals can give their specific mobile number to fellow workers as they wish. The edit facility allows the update the details. Setting the "Disply Name" flag results in the employees name being displayed on the main screen. This could be useful for drawing attention to the personel you contact on a regular basis.
The process of displaying the employees details is shown in the three screen dumps below. The first screen dump shows the office with no employees highlighted. The second shows an employees icon highlighted and the third shows the dialogue giving the details of the employee.
At the bottom right of the screen is the main menu icon. Pressing this icon allows you to return to the main menu. Pressing the back button on your mobile will achieve the same result. In addition to returning to the main menu the main menu allows the user to add, delete or edit an icon entry. To delete or edit an icon entry the entry has to be highlighted.
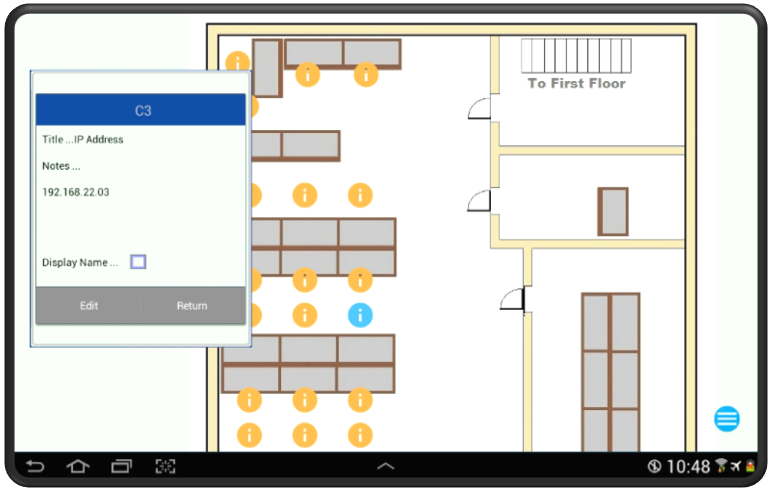
There are three screens included in the Office dataset. There is the "Ground Floor" shown above, also the "Second Floor" which is linked by the link on the staircase, there is also the IP Addresses. This demonstrates another aspect of ImageMap. It utilises the same base image as the "Ground Floor" screen but in this instance it acts as a record of the IP addresses used in the office. It could equally have been utilised to record the PC reference number or other equipment details associated with a specific location. It this way ImageMap is being utilised as a record of assets possible used by the PC support team to keep tract of equipment. Below is a screen dump of the "IP Address" screen.
You will notice that the "Item" icon has been utilised to maintain the data. As with the employees icon the user first highlights the icon then by pressing a second time the display dialogue is displayed.
The Office data set has been bundled as a zip file. Down load the zip file onto your Android device and place it in the directory defined as the input directory. This by default will be /mnt/sdcard/Download. Load the dataset by calling the "Database" screen, pressing the "Import Data - Zip File" button and selecting the specific zip file which in this case would be OfficeFile.zip.
The following is the Office zip file :- OfficeFile.zip.
The Project data set has been created to demonstrate how ImageMap can be utilised as a tool for a logical group of peaple as against a physical group, in this case a business IT project. Unlike the Office data set this group of peaple is not set out in a geographical image but in a logical image. The logical image is the structure of a IT project with the Project Manager, Architect, DBA and then the specific teams set out in the image.
The aim was to create a data set for a specific project and then pass the data set out to all members of the project thereby giving everyone contact numbers for all of the project members. When one of the project members needs to contact each other they have all the details on their mobile. This could be a project located in one country but accessed on a regular basis from another country for instance where a project is off shored. In this instance personel in another country are not interested in the physical location but in the employees relationship within the team. This is shown in the underlying image.
Shown below is screen dumps of the main screen for both a tablet and a mobile.
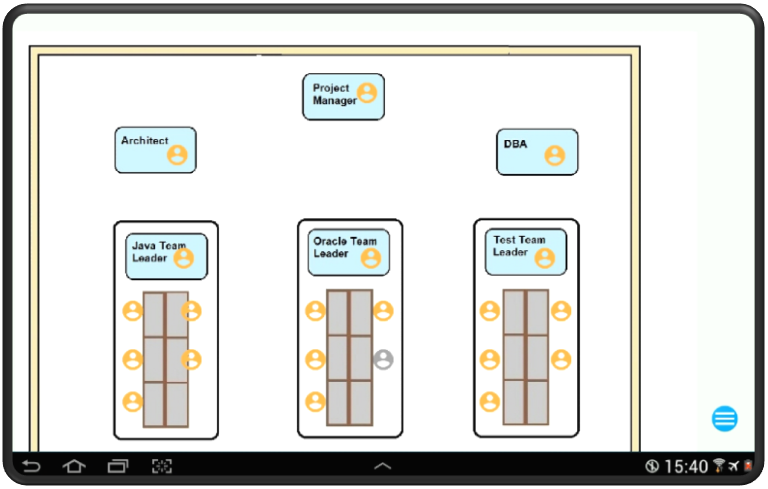
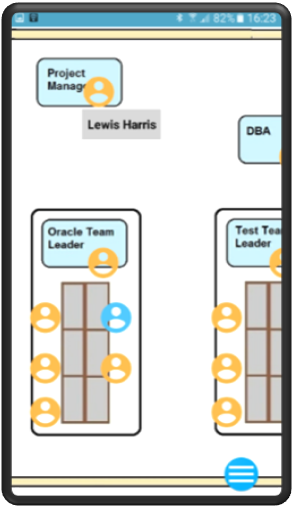
The tablet version of the Project dataset is shown above with the mobile implementation displayed below. As you can see the employees icons are grouped around in their respective teams and in this instance there are no link or item icons utilised. As with the Office dataset above the details of the employees are displayed when the required icon is selected and then displayed again to bring out the display employee dialogue.
The Project data set has been bundled as a zip file. Down load the zip file onto your Android device and place it in the directory defined as the input directory. This by default will be /mnt/sdcard/Download. Load the dataset by calling the "Database" screen, pressing the "Import Data - Zip File" button and selecting the specific zip file which in this case would be ProjectFile.zip.
The following is the Project zip file :- ProjectFile.zip.
The Contact dataset utilises ImageMap not to keep employees contact details but for ones own friends and family. In this instance I use the two dimensional space to display a map of a large part of the UK with the family icons displayed at the town where they live. So the icon for Colin Green is positioned next to the town of Newport which is the town he lives at. Displayed below is the mobile implementation of this dataset.
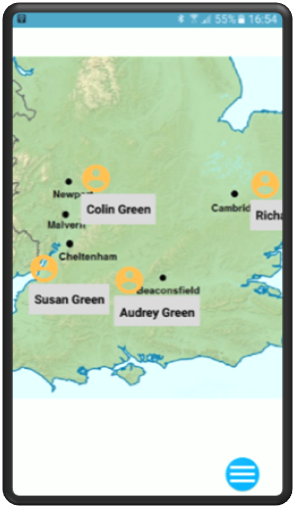
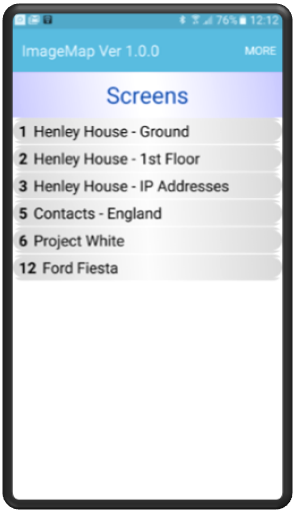
As you can see from the above screen dump the use of ImageMap to display ones contacts in a two dimensionsl space can assist in obtaining the contact details. The second mobile screen dump shown above displays the initial screen with all six screens given in the data sets. This, the Contacts data set is entry 5.
The Contact data set has been bundled as a zip file. Down load the zip file onto your Android device and place it in the directory defined as the input directory. This by default will be /mnt/sdcard/Download. Load the dataset by calling the "Database" screen, pressing the "Import Data - Zip File" button and selecting the specific zip file which in this case would be ContactsFile.zip.
The following is the Contact zip file :- ContactsFile.zip.
The Car Manual data set takes ImageMap away from the display of employees details. In this data set it is being used to display information relating to a car, specifically a Ford Fiesta and the information is the information one would find in the car manual.
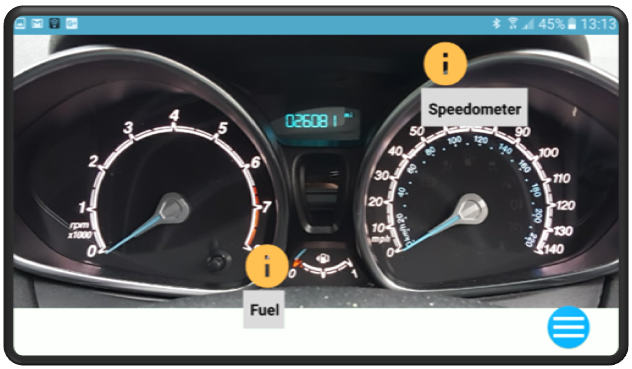
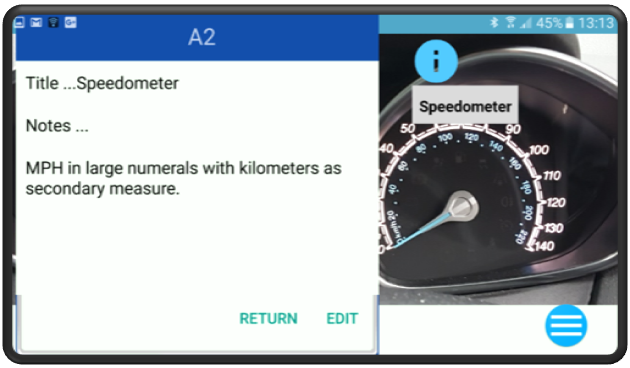
The first screen shown below gives us an iconic picture of a car. On the car are two link icons which take us to different views of the interior. The second screen dump below gives us a view of one of these links, "Gauges", which is a picture of the interior showing the main gauge panel. There are two item icons on the image . The third screen dump below shows us the dialogue for one of the items which gives the user a description of the specific gauge namely the Speedometer.
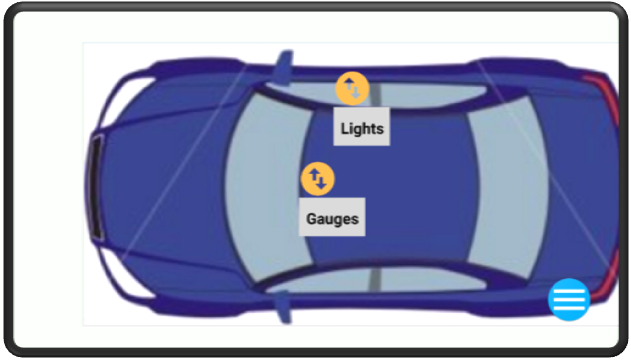
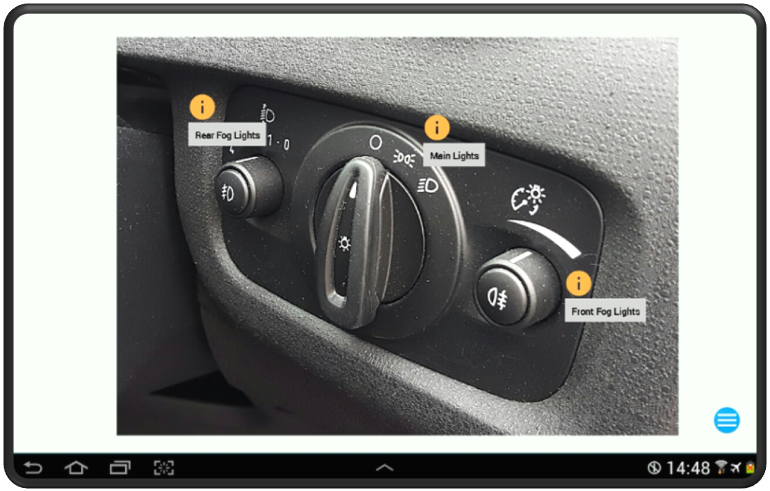
Below is a screen dump of an alternative link, the lights panel, but in this instance it is displayed on a tablet with the greater screen size.
The Car Manual data set has been bundled as a zip file. Down load the zip file onto your Android device and place it in the directory defined as the input directory. This by default will be /mnt/sdcard/Download. Load the dataset by calling the "Database" screen, pressing the "Import Data - Zip File" button and selecting the specific zip file which in this case would be CarManualFile.zip.
The following is the Project zip file :- CarManualFile.zip.
The ImageMap Manual is the last and largest of the example datasets though it is not correct to say it is an example dataset. It is instead a complete manual that the user can keep on their mobile to assist the user. It use's ImageMap to create a help manual for itself.
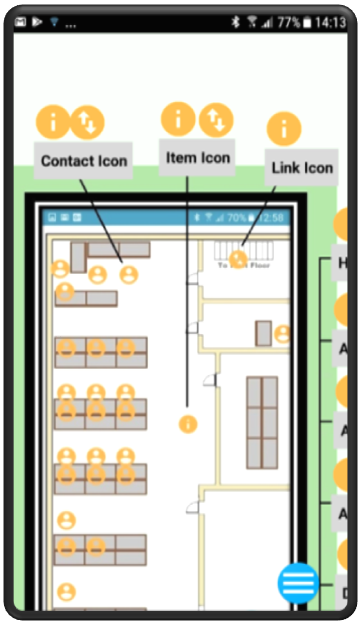
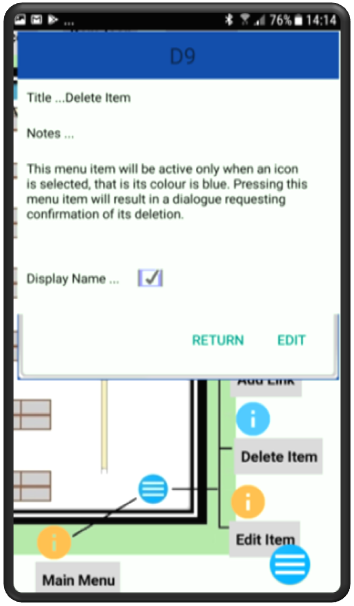
Below you can see three example screens. These illustrate how the help manual shows the data provided in the first dataset, the Office Dataset, to demonstrate the functionality of ImageMap. It uses Item Icons to provide information about individual functions and Link Icons to link to screen shots of functions that result in a new screen appearing.
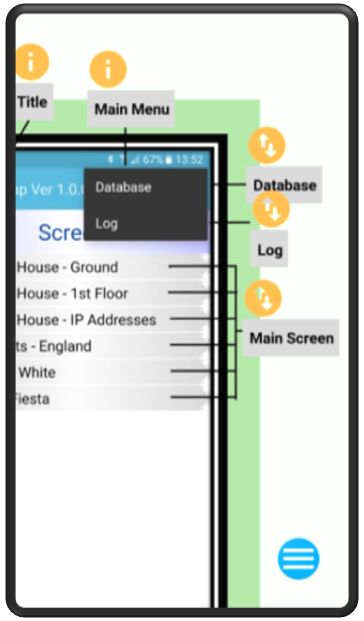
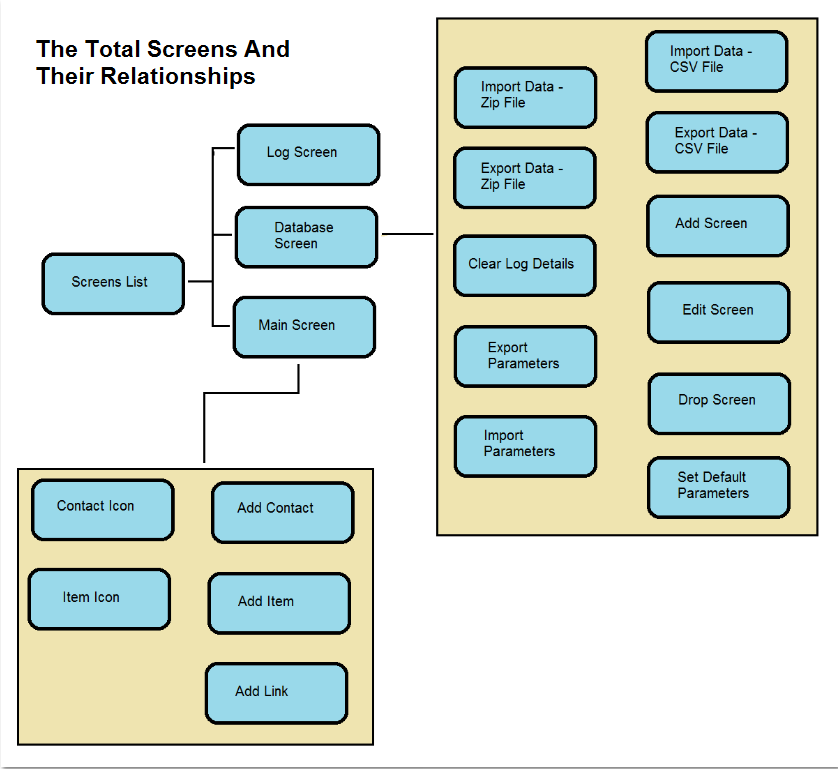
The entire help manual covers twenty screens and the relationship between these screens is shown in the fourth screenshot below.
The ImageMap Manual data set has been bundled as two zip files. Down load the zip files onto your Android device and place it in the directory defined as the input directory. This by default will be /mnt/sdcard/Download. Load the dataset by calling the "Database" screen, pressing the "Import Data - Zip File" button and selecting the specific zip file which in the first case will be ImageMapMan1.zip and then when that zip file has loaded repeat the operatoin with ImageMapMan2.zip.
The following is the first ImageMap zip file :- ImageMapMan1.zip.
The following is the second ImageMap zip file :- ImageMapMan2.zip.